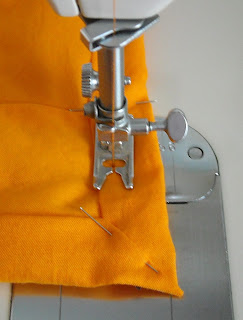
Back in August, I had a question about how I bind my quilts. Since I had a quilt in progress, I decided to demonstrate my process.
You will need: Quilt top and backing, batting, pins
Preparation: For this method, your quilt backing needs to be larger than the quilt top. I make mine about 4" larger, so for a quilt top that is 36" wide by 44" inches long, your backing would need to be 40" x 48", so you have at least 2" on every side.
Step 1: Lay the fabric you will use to back the quilt right side down on the ground.
Step 2: Lay the quilt batting over the backing.
Step 3: Lay the quilt top on top of the batting, centering the top over the quilt backing. Pin or baste as you normally would.
Step 4: Trim off excess batting.
Step 5: Quilt the quilt. This method looks best if you quilt a continuous or closed design. Stopping your quilting lines at the edge of the quilt will not look as nice on the back. Because the binding is the back of the quilt, there will be no binding to cover the end of the quilting lines on the back. I generally don't quilt within an inch or two of the edge so the quilting and binding lines won't overlap. See the picture at the end of this post for an example of what the quilting looks like on the back.
Step 6: Fold the edge of the quilt backing up to the edge of the quilt top.
Then fold the folded quilt backing up over the quilt top and pin in place. Do this around the edge of the whole quilt.
Step 7: When you get to the corners, they need to be mitered, and excess fabric will need to be trimmed off to make them fold nicely.
Pull the fabric out from the corner.
Snip off a little bit. Remember you can always snip more later if necessary.
Now snip off some fabric from the bottom edge to avoid bulk.
We want to fold this flap under to create our mitered corner, but it doesn't all need to be tucked under, so snip off a bit.
Fold under and pin in place.
When mitering, keep in mind the direction you'll be sewing. It's easier to sew when the all the miters fold clockwise...
...instead of counter-clockwise.
Now the quilt is all pinned.
Step 8: Sew around the quilt, about a quarter inch from the edge of the binding. I sew down the the corners to secure them. That's all, you're done!
I use this method on all my quilts, regardless of what the back looks like, but you do want to keep in mind what you'll be folding over to the front when you design the back.


Thanks for this awesome and very helpful tutorial, I'm just making a quilt and I hate hand stitching the binding. You have saved me hours of work!
ReplyDelete