Sunday, December 27, 2015

Scrap Quilt #2: A Christmas Gift to Myself

This quilt gets a boring name, but I love it too much to call it "scrap vomit" or "technicolor yawn," though that's what you'll see similar quilts called. "Technicolor yawn" seemed like a clever name until I discovered it was actually Australian slang for vomit; no thanks. It is not completely scraps, but mostly. Finished just before Christmas, I'm totally keeping this one for myself. (Having the Christmas tree in front of the patio door definitely complicated the photo shoot.)


This quilt features 1110 2.5" squares (20 blocks of 49 squares plus a border) and I quilted through every square twice. It is much more heavily quilted than most of my quilts and required a lot of thread. I quilted with a light pink thread to match the backing fabric. I originally intended to make the top even scrappier, with only one ring of matching fabric, but I'm really pleased I had enough matching scraps to do it the way I did.

Sunday, December 20, 2015

Yo-Yo Christmas Tree


Earlier this fall, my mom texted me a photo of a what essentially was a yo-yo tree with stuffed yo-yos. I made her this instead because I thought it would look better with flat yo-yos. I used this tutorial for guidance. The yo-yos range from 6cm to 22cm. I used a 3/8" dowel so a saw wasn't necessary because I could cut through it with my scissors. I hot glued the dowel into a 1" wooden spool. If I did this again, I would cut a circle of thin cardboard to insert in the biggest yo-yo to better support the bottom, otherwise it's large enough to be droopy. I hoped to find a star bead to stick on top of the dowel, but no luck, so I used a wooden star instead.

Finished size: approximately 4" wide and 8" high

Sunday, December 13, 2015

Origami Crane Ornament


Amanda made me several hundred paper cranes over the course of several years, so I decided to make her a crane ornament. I'm not sure why it took so long for crane inspiration to strike! I used a paper-piecing pattern.

Finished size: 5" diameter

Saturday, December 12, 2015

Origami Tree Ornament


Several years ago I made a tree like this out of paper, and I decided to try it with fabric, using this tutorial. I went with scraps of the fabulous fabric I used for Melissa's tree skirt. The squares of fabric used to create the tree tiers are 2.25", 2.5", 2.75", and 3". The cork circle is 4" in diameter. I added snowflakes around the edge and decorated the edges of the tree tiers with sparkly puffy paint. The fabric is just ironed to create the folded shapes and hot glued in place. I debated stiffening it with something to prevent fraying, but I thought that would make it too difficult to work with.

Sunday, December 6, 2015

Ribbon Owl Ornament


I saw an owl very similar to this on a hair bow at Joann's and knew I needed to make one for Amanda. Mine is a bit different though. I decided to use a rhinestone for the belly, so I glued two wooden discs together and painted them red to provide support for the rhinestone and the eyes. I also added googly eyes, since I didn't have black and white ribbon and also it seemed less fiddly. It is about 1.5" x 2".

Saturday, December 5, 2015

Mini Spools of Thread Ornament


Earlier this year Amanda began taking sewing classes, so I was inspired to create a sewing themed ornament by wrapping ribbon around tiny wooden spools and dropping them in a glass ornament.

Saturday, November 28, 2015

Twin Ornaments


It officially Christmas ornament season! These are for my 4 year old nieces. Since they are twins, I made the ornaments identical, but emphasized their initials a little more with the B and G ribbon. I also made the tops a little fancier than usual with rhinestones instead of buttons and some looped ribbon to add a little more pink.

Try making one yourself with this tutorial.

Sunday, November 22, 2015

Play Kitchen Accessories


Julie is making Claire a play kitchen for Christmas, so she wanted me to make an apron for Claire. I do not usually make apparel, and without having Claire on hand to actually measure, I used a tutorial to make an adjustable apron. I opted to make it only 16" long however, since I didn't want it to be too long.

I also made a few accessories:

Saturday, November 14, 2015

Hexagon Blocks

In September, Amanda went to visit her Grandma. While there, she sent me a photo of these hexagon quilt blocks, which were made by Amanda's grandma's mother-in-law, and said she was giving them to me. I was astonished to receive such an amazing gift! They are all hand-stitched. Amanda gave them to me when I saw her earlier this month, and we looked through all of them. Of course the first thing I did when I got home was sort them all. A lot of research and deliberation will be required before I commit to a project!

There are 50 total blocks, with only a few duplicates. The 43 unique blocks are pictured below:

Sunday, November 1, 2015

Elmo Bag


This is Claire's Halloween treat bag. She loves Elmo, so I figured this would be more appreciated and used than a Halloween themed bag.

Finished size: 6" x 2" x 7.5" plus handles

Saturday, October 31, 2015

Pumpkin Card


When I found this pumpkin paper I knew I had to make book page pumpkins to go with it. Happy Halloween!

Saturday, September 26, 2015

Red and White Redux

I spent the better part of 2015 working on this quilt in fits and starts. It is a revamp of fabric from my original red and white quilt, which I dismantled some time ago. It was from my early days of quilting and wasn't particularly stellar construction. I wanted to recycle the fabric into a new project, and I had some newer, somewhat coordinating, fabric to work in as well. 


I created the half-square triangles, and those sat around awhile. After a lull of much contemplation, I still hadn't figured out a design so I just decided to sew the squares into blocks of four. Then those sat around awhile. Once I finally settled on the arrangement for the blocks, I then couldn't decide if I wanted the center of the blocks to be red or white. I was leaning toward white, but everyone else said red, and eventually I came around to that choice. Assembly didn't take too long after that once I reached that point.


Finished size: 38" x 50"

Saturday, September 19, 2015

Unicorn Doll Quilt


I couldn't resist buying this unicorn fabric, but then, since I didn't have a project in mind, it just sat there. I finally decided to make a little doll quilt for my niece. She's just starting playing with dolls, and it is perfect for the wooden baby doll cradle my dad made when I was little.


I also made a matching cushion for the cradle:


Finished quilt size: 16" x 20"

Saturday, September 12, 2015

Velcro Pouch


My mom had a little drawstring pouch she used to hold her office keys, but the fabric was very thin and the keys wore through it. Since she doesn't sew, she stapled it back together. I offered to make her a new one. I opted for heavier fabric that will hopefully hold up better to the keys. This one is also lined, which the previous one wasn't, so that will help as well. Since this is a heavier fabric, I didn't think a drawstring would stay closed, so I went with Velcro instead.


Finished size: 4" x 4.5"

Saturday, September 5, 2015

Fabric Easter Egg


My sister and I have eggs very similar to this from our childhood, so of course my mom wanted me to recreate one for Claire. It is a Styrofoam egg with fabric stuffed into it. It just made sense to use the fabric from Claire's airplane quilt. Ours are a little different, and a bit smaller I think. The main difference is that our names were cross-stitched and there was lace around the name square. I didn't want to buy cross-stitch cloth for just a tiny piece, and I figured it would be much harder to cram that and lace into Styrofoam. This one isn't quite as tidy as ours, but I think it turned out decently. I'm not sure how it will hold up to being handled by a toddler though. 


Finished size: 4" high

Saturday, August 29, 2015

Fabric Photo Book

Earlier this year, we took a family trip to Florida. While at the airport, I had the brilliant brainstorm to make a fabric photo book for my niece. She's still a bit too young to be trusted with paper pages, but it was her first trip to Disney World, so I wanted to do something.


The book is 12 pages long. I think selecting the photos was the longest part of the process, with shopping for supplies a close second, as it required a lot of fusible supplies and many trips to multiple stores. Actually putting it together did not take that long. The paper mock-up I made to use as a guide helped make that process go smoothly. I used printable, fusible fabric sheets for the photos, and I was really pleased how nicely they worked - both the printing and the fusing. I used fusible interfacing to stabilize the pages. The cover has fusible letters and a fusible applique. There was sewing involved in the creation of the pages and cover and binding them together.


Finished size: 8.75" x 8.75"

Sunday, August 16, 2015

Congratulatory Card


A congratulatory card for my cousin who just graduated from college and is moving to North Carolina for his first job teaching high school science.

Sunday, August 2, 2015

Polka Dot Spirals


I had a yard of this polka dot fabric that I bought randomly and wanted to turn into a quilt. However, I couldn't settle on a design because I didn't really think it went with anything except black. When I saw this spiral design, I knew it would be perfect! It ended up requiring 8 yards of black fabric to complete it.


Quilting presented a challenge. I wanted to quilt the spiral design even in the solid black columns, so I went to the store to look for some way to mark on black fabric. All the markers said to mark on the wrong side of the fabric. I bought tailor's chalk, figuring chalk would be the most likely to easily wash out and it worked just fine! I went ahead and quilted it using teal thread.

Pinwheel detail on back

Since I only had a yard of polka dot fabric, I knew I was going to have to find a coordinating fabric for the binding because I didn't want to use black. This proved challenging. I imagined use a teal or turquoise binding, but those didn't look right. I took a scrap of polka dots to the store and purchased two failed options, so once it was quilted, I just took the entire quilt with me. I ended up using a lighter blue, which meant the teal quilting doesn't quite match, but it's only noticeable up close.

Finished size: 52" x 71"

Sunday, July 12, 2015

Split Nine Patch Quilt

This stack of fabric had been set aside a for awhile, waiting for me to figure out what to do with it. The colors looked so nice together, but I didn't have very much of any one fabric, and most were either fat quarters or leftovers, or both. Then I saw this split nine patch quilt and decided the design would work for the amount of fabric I had, though I did ended up purchasing another purple fat quarter.


Mine did not end up quite the same, because I didn't split the nine patches quite as drastically and then I forgot to offset the rows. I did however find this amazing paisley fabric for the back with the exact mix of colors. It was on the clearance rack and it was 50%, so it really couldn't have been more perfect.


Finished size: 47" x 69"

Sunday, June 21, 2015

Rainbow Stars and Stripes Quilt

My scrap challenge has proved to be a useful motivator for starting projects I've been meaning to get around to, simply so I can maximize my scraps, and this idea had been floating around awhile. After I took apart the dragonfly quilt, I knew I wanted to repurpose the fabric, but I was limited by the shape of the scraps. Fortunately I was able to create a nice pattern with what I had to work with.


While I always like the look of quilts with a lot of white in photos, I was nervous about how one would turn out in real life, but I am really pleased with the results. I considered quilting with colored thread, but I'm glad I didn't, though I think this is the first quilt I've ever quilted with white thread.

I was pleased to finally find a use for this great multi-colored striped fabric for the back, as well as the orange batik dots for the binding, though I barely made a dent in the batik.


A close-up of the fabrics

New items purchased to complete this quilt: batting, though I should probably count the solid white fabric as well, because I can't remember why I bought it in the first place

Finished size: 39" x 52"

Saturday, June 20, 2015

Monday, June 1, 2015

Scrap Challenge

I have wanted to make another scrap quilt for awhile now - my first scrap quilt is one of my most used quilts - but it took me a long time to settle on a design. The blocks from my Quilt Block Project are never going to become a quilt (I've actually taken several apart) as they just weren't color coordinated enough, but the fabric I was planning to use for the backing will make a great backing for a different scrappy quilt!

I've decided on not one, but three different scrappy layouts, and we'll see 1) how many scraps I have and 2) how many quilt tops I can finish by the end of the year.

The designs I've chosen are:
  • The Arkansas Crossroads quilts, pictured here. This will likely be the third one I start since it requires the most solid fabric. I may also end up using this design for a non-scrap quilt.
  • A modified version of the Scrap Vomit/Technicolor Yawn, also pictured at the same link. I plan to use solids only for the ring of 8 squares pictured in blue for maximal scrappiness, but I might have enough to do those in scraps as well.
  • Another modified version of a scrap vomit quilt, which also looks like an Irish chain.
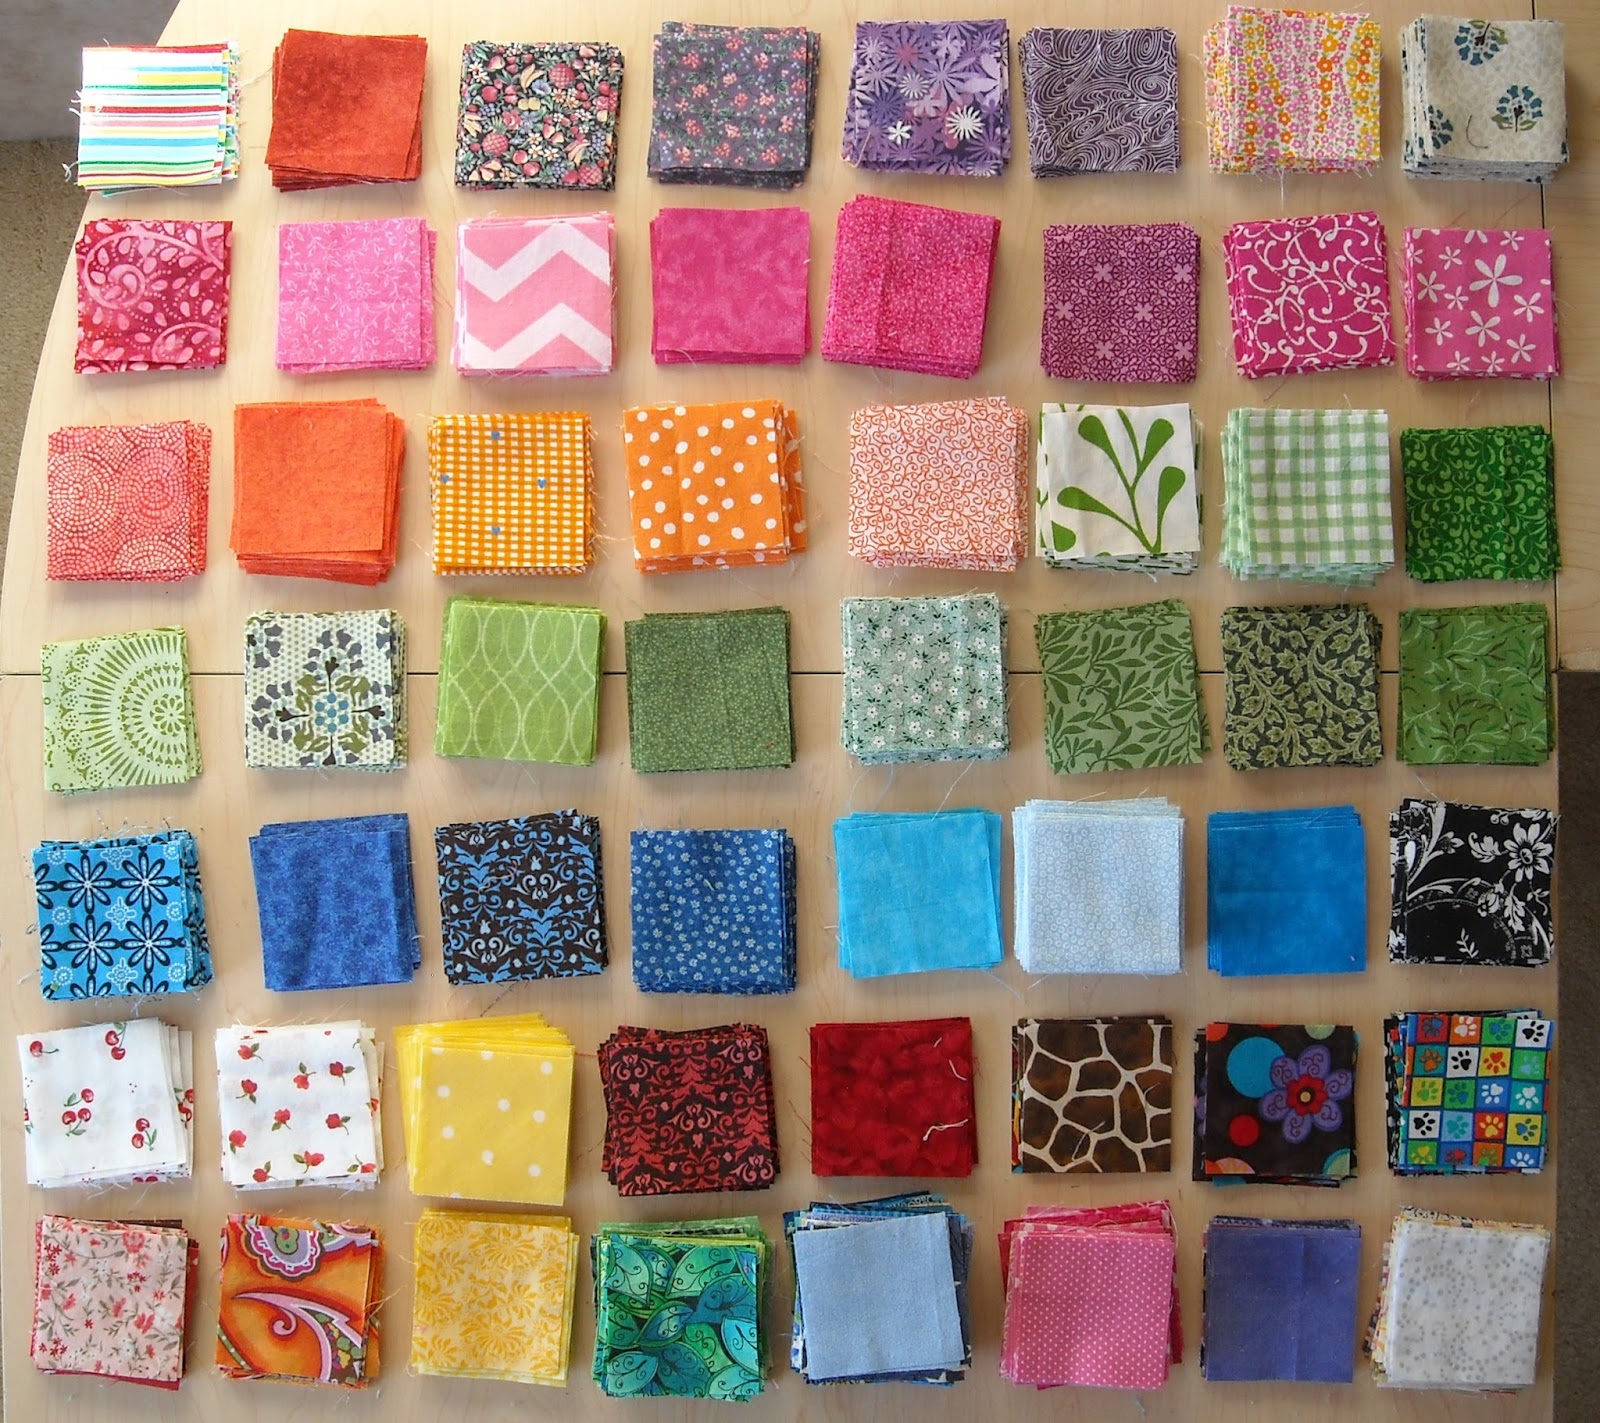
 I've already starting cutting 2.5" squares from my boxes of small scraps:


I have no idea how many there are at this point, but based on the number and size of the piles, I'm going to guess at least 600. I will need at least 1800 for the two scrap vomit layouts, so we'll see how many squares my larger scraps yield. Each layout will have 20 blocks, so I don't want more than 20 squares of any one fabric per quilt. My first scrap quilt used 4.5" squares. It's remarkable how many of those fabrics I still have scraps of nearly 15 years later!

Saturday, May 16, 2015

Embroidered Birthday Pillowcases

Zack's grandma sent us some pillowcases embroidered for our birth months:


She had previously sent us embroidered animal pillowcases.

Saturday, April 18, 2015

Santa Bags


I've had this Santa fabric for awhile now and have been looking for a project that showcased it. It paired nicely with this red polka dot fabric, recycled from an apron, to create a bag that fits a couple of picture books just perfectly!


Finished book bag size:  11" x 9.5" x 1.25"


I also used some scraps to create two little drawstring bags

I'm particularly pleased with how finished-looking the drawstring part turned out

Finished drawstring bag size:  4.5" x 5.5"

ETA September 2015:


Here is Claire carrying her bag (and some snacks) at the library! (Santa-side in, since it's only September.) I asked my sister what they got and she said "Three Elmo books and an Elmo DVD." Maybe I should look for some Elmo fabric...

Saturday, April 11, 2015

Zippered Penguin Pouch


I made this zippered pouch for the penguin ornaments I made last Christmas. I'm surprised it didn't occur to me to make a storage bag for them to being with, but recently I've been brainstorming reasons to make bags in order to use recycled zippers. I think this bag will be large enough to store the mini tree skirt and little stuffed penguin tree topper as well.


I'm particularly please with how the zipper tabs turned out

Finished size: 7.5" x 6.5" x 1"
Related Posts Plugin for WordPress, Blogger...