A beautiful 60 degree day in March, and what am I doing? Making Christmas decorations naturally.
I'd been saving selvedge for a while and I decided I needed to do something with it. I didn't have all that much, so I vaguely thought I would just make a little pin cushion. Not all the dots were the same length though, so I decided to stack them by length. Once I realized I could make a tree, I was sold. It shifted a bit during sewing, so it's a bit of a wonky tree.
The star at the top was leftover from the 3D ribbon trees. It was not originally a button, so it had to be turned in to one with the assistance of my handy rotary tool.
If you hold it up to the light, it looks like it's snowing!
Finished size: 7" x 11.5"
Showing posts with label rotary tool. Show all posts
Saturday, March 21, 2015
Sunday, February 23, 2014
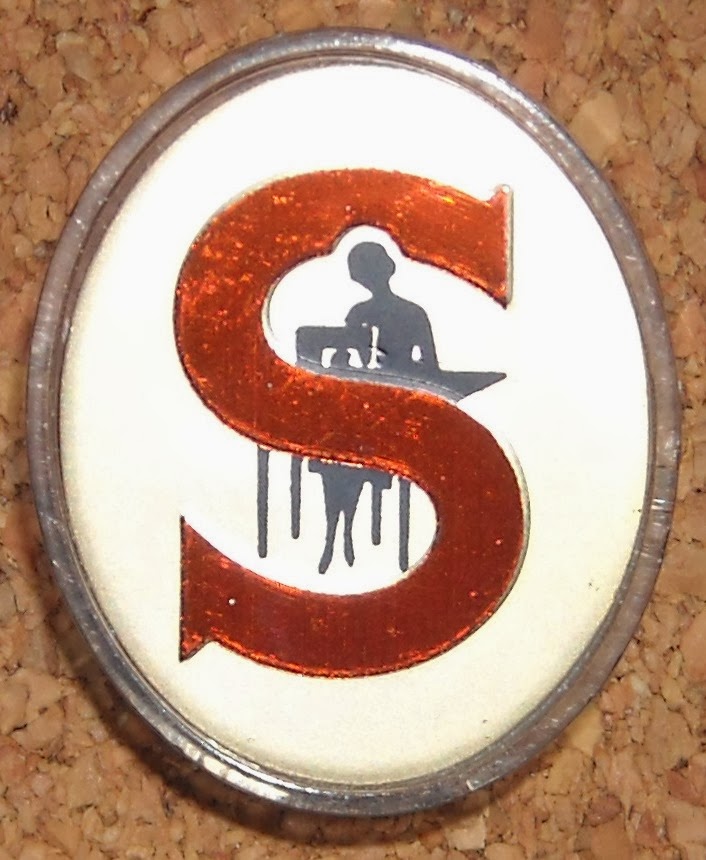
Singer Souvenir
I wanted to save a piece of my Singer, so I pulled off this logo. It's about 3/4" by 1". However, it had 1/2" long plastic prongs on the back attaching it to the machine that needed to be removed before it could be useful. I pulled out my rotary tool, cut off the prongs, and hot glued a thumb tack in their place. It joined the spool pin on my bulletin board, which you can see is not getting used for its intended purpose:
(Amanda made me the awesome Double Unicorn Success Club card. It refers to this blog post. We love The Bloggess. And unicorns.)
Sunday, February 16, 2014
Recycled Spools
I had 2 old empty spools that I wanted to save simply because they were old, but what to do with them to make them useful? They were just sitting in a box of random parts. Enter my new rotary tool obsession! I cut off one end of each spool, since there was one end of each that was in better shape than the other.
This was definitely the most challenging of my rotary tool cutting, since I had to cut through the outer layer, six spokes, and the inner layer. I filled the holes that were created with hot glue to protect the label from getting a hole poked through it. I coated the labels with a layer of Mod Podge for additional protection.
They are about 1" in diameter.
| The pin. |
This was definitely the most challenging of my rotary tool cutting, since I had to cut through the outer layer, six spokes, and the inner layer. I filled the holes that were created with hot glue to protect the label from getting a hole poked through it. I coated the labels with a layer of Mod Podge for additional protection.
| The back of the pin. |
| The magnet. |
They are about 1" in diameter.
Labels:
2014 projects,
magnets,
mod podge,
pins,
rotary tool,
spools
Saturday, February 15, 2014
Rotary Tooling
Quite a while ago we bought a rotary tool. Despite my excitement over now having one at my disposal, I didn't do anything with it. That's recently changed, as I now seem to pull it out all the time! Usually, this randomly occurs to me around 8:30pm on a week night, so I don't have "before" pictures of these projects.
The first project I attempted was cleaning up this metal moose ornament. I got it in 2011 as a souvenir from Yellowstone, but when I pulled it out the next Christmas, the coating was flaking off and making a mess. I put off dealing with it because I was afraid it would make even more of a mess. For a sanding project, I would definitely recommend a mask, as I ended up with dust up my nose. I used a sandpaper tube attachment, and now all the flakiness is gone. However, while it's clean and smooth, it doesn't look very attractive, so I've still got to figure out what to do with it. A trip to Hobby Lobby is in order.
Next I trimmed about a 1/4" off the top of this pen tube. It was tapered and I wanted both ends to look the same. It's only a 1/4" in diameter, but I was concerned about using the rotary cutting discs because they look like really stiff circles of sandpaper; could they really cut anything? Turns out, they can, but it makes a bit of a mess if you are cutting through plastics, and I definitely recommend safety glasses to avoid getting bits in your eyes.
| Rotary tool with cutting and sanding attachments. |
The first project I attempted was cleaning up this metal moose ornament. I got it in 2011 as a souvenir from Yellowstone, but when I pulled it out the next Christmas, the coating was flaking off and making a mess. I put off dealing with it because I was afraid it would make even more of a mess. For a sanding project, I would definitely recommend a mask, as I ended up with dust up my nose. I used a sandpaper tube attachment, and now all the flakiness is gone. However, while it's clean and smooth, it doesn't look very attractive, so I've still got to figure out what to do with it. A trip to Hobby Lobby is in order.
Next I trimmed about a 1/4" off the top of this pen tube. It was tapered and I wanted both ends to look the same. It's only a 1/4" in diameter, but I was concerned about using the rotary cutting discs because they look like really stiff circles of sandpaper; could they really cut anything? Turns out, they can, but it makes a bit of a mess if you are cutting through plastics, and I definitely recommend safety glasses to avoid getting bits in your eyes.
I've had this pen since I was a kid, and, even when it no longer wrote, I kept it because loved it. However, I still have no idea how I'm going to turn this tube into a useful memento.
Subscribe to:
Posts (Atom)